7 videos to get you over the last hurdle
Sketch up Movie
First two are to help with scenes, settings and creating that movie for Vimeo.
SU set Movie 1 from Grant Beerling on Vimeo.
Sketch up to Photoshop 2 from Grant Beerling on Vimeo.
Publishing to Vimeo
Sketch up to Vimeo 2 from Grant Beerling on Vimeo.
Sketch up 2D image saved for photoshop
Sketch up 2D image for photoshop (png) from Grant Beerling on Vimeo.
Sketch up to Photoshop
Sketch up image to Photoshop 1 from Grant Beerling on Vimeo.
Sketch Up to Photoshop 2 from Grant Beerling on Vimeo.
Sunday, 17 June 2012
Wednesday, 28 March 2012
The Evil that is 'Centimetres'
Scale Auto Cad from MM to CM
If you have drawn in cm (which as we know construction is always in Metres or mm) not to worry. As with metres follow the instructions for creating your own scale, but this time instead of writing 1000 (ie 1000mm =1m) and then the scale you desire (1:100 i think) you put in the box 100 (as 100cm = 1M).
AutoCAD Annotation 2 from Grant Beerling on Vimeo.
Trees
As requested by Robert (FE) and Simon (MA)
An old vid on Brush basics maybe of some help.
Photoshop CS5 Graphic Trees from Grant Beerling on Vimeo.
An old vid on Brush basics maybe of some help.
Photoshop CS5 Graphic Trees from Grant Beerling on Vimeo.
CS6 Free Beta Download
Worth a look
http://www.youtube.com/watch?v=lOgHRaViiGQ&feature=related
With right image the Oil filter works a treat
Garish Original


A basic tutorial on what features are new (must admit I found a load more in brushes).
http://www.youtube.com/watch?v=lOgHRaViiGQ&feature=related
With right image the Oil filter works a treat
Garish Original

Oil Filter plus some Image Adjustment (too dull, over did it, but when viewed in full screen a lot better)

Its a matter of deciding the function of the image i.e. stand out or may be a bit more atmospheric on closer inspection. The Oil certainly has more movement and atmosphere.
An Attemp at Atmosphere

Helped with the Oil Filter

FE The beginning of Photoshop
Class tutorials
A run through of what went through in class, plus the photo-merge videos from the BA class.
Note the 'how to save' different types of files and why.
http://vimeo.com/album/1884640 FE Album
http://vimeo.com/album/1884632 HE Album
FE CS6 Basic Introduction from Grant Beerling on Vimeo.
FE CS6 Cut Out from Grant Beerling on Vimeo.
FE CS6 Move from Grant Beerling on Vimeo.
FE CS6 Shadow from Grant Beerling on Vimeo.
FE CS6 Image Adjust from Grant Beerling on Vimeo.
Photo merge
Videos from The BA following the same images plus some information (Very important) on how and what files to save to for further work and printing.
Photoshop Content Aware from Grant Beerling on Vimeo.
Photoshop Photo merge, save to PSD and Jpeg from Grant Beerling on Vimeo.
Photoshop Effects (part one)
A place to start
I have put together the videos based on the lesson on Thursday. Also some extra bits and bobs so worth watching to help you along the way.
I have also pulled in a FE vid into the mix, on 'shadows' as requested (Chris).
http://vimeo.com/album/1884632 All four in an album
http://vimeo.com/album/1884640 FE with the extra on Shadow.
Photoshop CS6 Pencil Effect from Grant Beerling on Vimeo.
Photoshop CS6 Sepia via Styles from Grant Beerling on Vimeo.
Photoshop CS6 Move to Base Sheet from Grant Beerling on Vimeo.
Photoshop CS6 Annotation from Grant Beerling on Vimeo.
Shadow from the FE tutorials
FE CS6 Shadow from Grant Beerling on Vimeo.
Wednesday, 21 March 2012
Assignment One More detail
Detail
More detail for the first assignment.
CD
Power point
As you all performed so well on the practice run (plus a new schedule) I would like you all to produce a Power Point or Keynote (mac) slide show with at least one slide showing your AutoCAD drawing from the layout view saved as a pdf or a screen shot (more if necessary), images of the purposed site for your bench and context images/explanation.
Brief bullet points, picture paints a thousand words, less is more, and convince me!
This will be good for you as its difficult to do, a real challenge,
10 slides max.
AutoCAD Drawing
A dwg file on the CD, with all the layers, layouts and annotation.
Sketch Book
Scan and show images/thoughts as Jpeg images on the disc in a
in a file called: Sketch book.
This is about the process.
Printed
A2 to the relevant scale for the size of paper (see videos)
Dimensions, annotation and title block (bench name, name, scale, date etc)
Tuesday, 20 March 2012
FE Assessment sheets 1,2 and 3
For your Information
Read carefully, tick all the boxes and you will be fine.


Tuesday, 13 March 2012


Saturday, 10 March 2012
FE Fly through Sketch-up
Have a Go!
What could possibly go wrong! Don't worry if it does not work at first, thus try only 5 scenes to make sure your settings work.
Follow the instructions on the video and all should be crystal and sharp.
As a bonus may be do two or three short scenes (6 or 7 per shot)
It does not take long to set up, just a long time to Render (2-6hours depending on computer age/speed)
Untitled from Grant Beerling on Vimeo.
AutoCAD Annotation to Print
Clumsy but effective
A work around to get your annotation to work, there are other ways, but this is a simple way to get a result. As you get more familiar with AutCAD then the other options will come into play.
Trying to an avoid overload of information and thus lead to some confidence on the basics.
Annotation one from Grant Beerling on Vimeo.
Annotation two from Grant Beerling on Vimeo.
Layout from Grant Beerling on Vimeo.
Settings for Print from Grant Beerling on Vimeo.
Exporting to PDF from Grant Beerling on Vimeo.
Photoshop' How did it do that' syndrome.
The Annual 'WOW' update
Every update Adobe try and put some surprise in the programme, well 'content aware' was the CS5 jaw dropper.
Easy to do, for an astounding effect.
(note Mac users with old Macs, make sure you are running 64bit not 32 anything from Leopard onwards, post 2006, http://www.youtube.com/watch?v=hle1cf7QVL8 also early CS5 make sure you have the latest updates as there is a bug on Content Aware for large areas CS5.5 no problem).
Videos
Explaing two ways to use 'Content Aware' plus Photomerge.
Photoshop Content Aware 1 from Grant Beerling on Vimeo.
Photoshop Content Aware 2 from Grant Beerling on Vimeo.
I forgot to get rid of the aerials as we did in class, as this is the obvious improvement to the image, so an operation for content aware in removing them as we did in the North By North West image, removing Cary Grant.
Tuesday, 6 March 2012


Saturday, 3 March 2012
Photoshop
Photoshop
Four videos taking you through the basics of cutting out an image from one photograph and transferring it to another.Then moving on to re-size, transform, flip, adjusting tone, adding shadow, enabling and disabling masks, filter gallery and finally some extra bits and bobs to play with.
When you get to the point that you have to do work for Rod with Visual design then use these video's for reference, but don't be limited by what is shown, experiment, photoshop is a massive programme.
Note
Always worth creating extra layers if you are unsure about a new move. Don't forget to 'Save' at regular intervals as there is no automatic background back up.
Finally
When you are done 'save' as a photoshop file (psp) then flatten the image (right click on your background layer at the bottom of the layers pallet, at the bottom of the drop down 'Flatten image', click to flatten, say yes to discarding unused layers. Then the format dialogue box will come up, click on the drop down on file type and choose jpeg, PDF, etc. Save and continue through the other commands thinking about the size of the file you want).
Its a good idea to save a PSP, (flattened)Jpeg and (flattened)PDF. As some printers can be quirky with either jpeg or PDF (the psp is in an unflattened state so you can edit your layers at another time, this file will be large thus the need for flattening to reduce the file size for printing, typically A1 colour pdf should be no more than 10mb).
More to follow.
Work through these for practice. After easter on the second assignment we will eventually use photoshop to put your 3D bench in the space that has been chosen with some extra people. Switched around so you can complete Rods Sequence photographs.
Photoshop 1 from Grant Beerling on Vimeo.
Photoshop 2 from Grant Beerling on Vimeo.
Masks with quick selection and refine line tools
Photoshop 3 from Grant Beerling on Vimeo.
Using the Image, Adjustments to manipulate an image. Brush tool for shadow
Photoshop 4 from Grant Beerling on Vimeo.
Tuesday, 28 February 2012
FE Hop Garden update
Hop Garden
Hadlow College Hop Garden pt 3 from Grant Beerling on Vimeo.
FE class building a design in sketch up for the Kent Show 2012
Garden component requirements

Hadlow College Hop Garden pt 3 from Grant Beerling on Vimeo.
FE class building a design in sketch up for the Kent Show 2012
Garden component requirements
Wednesday, 22 February 2012
Digi Map
Instructions
A quick vid on downloading a Carto Digi map.
Note
First login leads to a confirmation request page, so fill in the necessary, send, then wait for about two days (not literally in front of your computer).
A confirmation will be sent, probably via your student e-mail (that alone confirms your student status).
Then login. You will get an extra window asking for the organisation, type in 'Green', then click on Greenwich University (in the drop down box)
https://vimeo.com/37279651
Carry on as per video.
Bring in Greenwich Passwords.
Tuesday, 21 February 2012
FE Sketch-Up Oast update
Update on the build
When placing components think about the colour, style and theme, so that there is a consistency to the model.
Good luck on your build
When placing components think about the colour, style and theme, so that there is a consistency to the model.
Good luck on your build
Wednesday, 15 February 2012
Bench videos
Basics
Quick run through of basic commands
Bench Builds 1-3
Run through of setting out and build of a curved bench.
All in an Album
BA AutoCAD
https://vimeo.com/album/1828246
I will embed later when they are all up and running
Basic Info from Grant Beerling on Vimeo.
Build Bench 1 from Grant Beerling on Vimeo.
Bench Build 2 from Grant Beerling on Vimeo.
Bench Build 3 from Grant Beerling on Vimeo.
Tuesday, 14 February 2012
Presentation Help, etc
Power point
Brief and to the point, tutorial for power point, normal slightly annoying music in the background
Overall should get you up and running
http://www.youtube.com/watch?v=3ZUwFwooMrY
Keynote
A long dull tutorial, just skip along (I should of done 4 smaller, time etc) to what you need to know.
Keynotes basic tutorial from Grant Beerling on Vimeo.
Also some extra stuff from Apple. Just look down the page and watch as needed. Some great effects, though remember less can be more.
http://www.apple.com/iwork/keynote/
Presentation Build Help
Just for those of you who missed the class, a brief explanation of do's and don'ts when building a PP or Keynote show.
Basic Presentation Points from Grant Beerling on Vimeo.
See you Thursday for your practice presentations.
Wednesday, 8 February 2012
FE Sketch-Up Oast Roof
Oast Roof
Hadlow College Hop Garden from Grant Beerling on Vimeo.
FE sketch up Hop Garden Roof 0 from Grant Beerling on Vimeo.
FE sketch up Hop Garden Roof 1 from Grant Beerling on Vimeo.
FE sketch up Hop Garden Roof 2 from Grant Beerling on Vimeo.
FE sketch up Hop Garden Roof 3 from Grant Beerling on Vimeo.
FE sketch up Hop Garden Roof 4 from Grant Beerling on Vimeo.
Fly through and tutorials from Tuesdays lesson 7th February.
Hadlow College Hop Garden from Grant Beerling on Vimeo.
FE sketch up Hop Garden Roof 0 from Grant Beerling on Vimeo.
FE sketch up Hop Garden Roof 1 from Grant Beerling on Vimeo.
FE sketch up Hop Garden Roof 2 from Grant Beerling on Vimeo.
FE sketch up Hop Garden Roof 3 from Grant Beerling on Vimeo.
FE sketch up Hop Garden Roof 4 from Grant Beerling on Vimeo.
Sunday, 5 February 2012
Bench of Oblivion
Oblivion
Put sketches together for those who are wondering about the process.
I may add this is the route I take, so so it may be helpful for some and not others.
1) Big Sketchy lines with the title in my head.
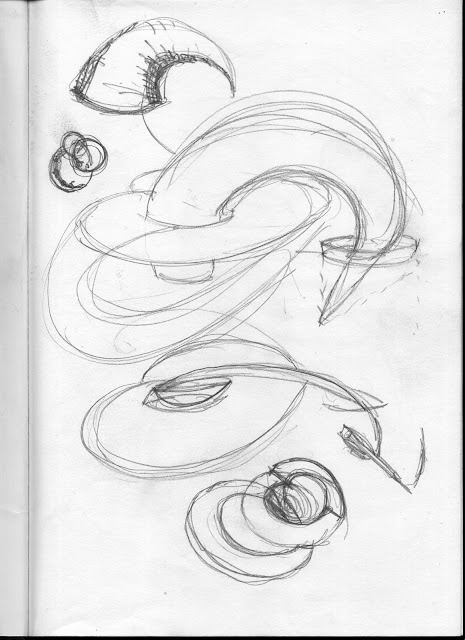

Getting more refined


Some kind of resolution, plus a basic plan, top, side and front view.


Lots of curves and twists so that issues you come up with on your designs, I will hit as well.
Note
Always a good habit to put people in your sketches (even the rough ones)
a) Good practice
b) Gives the sketch a sense of scale
A 'Simon Templar' (The Saint) will do.

The p1800, now that is good design
FE Annotation
FE Video's
FE Annotation 1_ 5/2/12 from Grant Beerling on Vimeo.
FE Annotation 2_ 5/2/12 from Grant Beerling on Vimeo.
A simple route for annotation @1;100 on A2
Export as a PDF for printing
Fly through of model in its basic form.
When your models are finished we shall do a fly through similar to this.
Grant
Dishwater Videos.com
Dull, Dull, Dull.
Really not going to make the Oscars with these, but picking up on last weeks lesson. I have come back to the drawing, this time remembering how I constructed it in the first place.
Datums
Whenever you put together a drawing its always worth noting your first datum points (in construction lines), as other points often spring off them and if you get them the wrong way round the drawing won't come together.
So a bit like the exercise that I have given you. You have to think about how best to to draw your sketch into AutoCAD. You can never have too many construction lines.
So five short video's, watch pause and draw.
FE class
I have directed my FE class onto the blog as there is a lot of cross over (they are ahead) and both classes will benefit from the blog.
Videos not embedding at present (chasing Vimeo) so click on links
For BA Garden Designers
http://vimeo.com/album/1828246
Lack Garden 1 from Grant Beerling on Vimeo.
Lack Garden 2 (lines to snap) from Grant Beerling on Vimeo.
Lack Garden 3 from Grant Beerling on Vimeo.
Lack Garden 4 from Grant Beerling on Vimeo.
Lack Garden 5 from Grant Beerling on Vimeo.
FE Video's
http://vimeo.com/album/1828249
A simple route for annotation @1;100 on A2
Export as a PDF for printing
Thursday, 2 February 2012
2nd February
Already!
A nice steady lesson later today.
We wil have a round table chat on how the Benches are progressing, with the idea that next week you should have the drawing completed, and issues can be tackled in class.
So a quick run down between now and Easter.
2nd Feb
Layers,trim/arrays and construction lines (Mr Lacks Drawing)
9th Feb
Composition of Power Point, general presentation techniques and problem solving.
16th Feb
Power Point of your basic Bench, photographs of the site, explanation of context (or not) and why your design will work (otherwise what is the point). This is a practice for your PP on the 22nd March a week before the hand in.
The five weeks between we will work on annotation/scale/composition. If we get ahead then we will start playing with Photoshop. Need images of people, at eye level, and above (start making a folder of good pictures to use).
Flicker is the place, then screen shot ('snippet' in Windows i think).
Some russian Bus stops, to prove there is nothing new under the sun.
 Create a context
 Love this, set at an angle to the road, the ratio's
very 'golden section.'

 Inspired by Kandinsky ,perhaps?
 A sitting dog ready to leap.
A nice steady lesson later today.
We wil have a round table chat on how the Benches are progressing, with the idea that next week you should have the drawing completed, and issues can be tackled in class.
So a quick run down between now and Easter.
2nd Feb
Layers,trim/arrays and construction lines (Mr Lacks Drawing)
9th Feb
Composition of Power Point, general presentation techniques and problem solving.
16th Feb
Power Point of your basic Bench, photographs of the site, explanation of context (or not) and why your design will work (otherwise what is the point). This is a practice for your PP on the 22nd March a week before the hand in.
The five weeks between we will work on annotation/scale/composition. If we get ahead then we will start playing with Photoshop. Need images of people, at eye level, and above (start making a folder of good pictures to use).
Flicker is the place, then screen shot ('snippet' in Windows i think).
Some russian Bus stops, to prove there is nothing new under the sun.


very 'golden section.'


Wednesday, 25 January 2012
The Bench
A Quick Crit
Just a note to say to bring in your design sketches and we will have a 1-2 min 'round the table' crit.
We will then look at drafting tools
And finally at 8;30 you can leave and any one who needs some help I can sit down with you for half an hour.
CAD pc's
Had a chat with the IT crowd, and yes its a licensing issue. They have 25 licence max, but on 25+ pc's. So if anyone is working on AutoCAD in the library that reduces the available licences. Annoying to say the least.
So I would suggest for the moment that the 'novices have priority' and the experienced to buddy up with novices.
We can chat about it in class.
Grant
Friday, 20 January 2012
Next Week 26th Jan
Hi All,
Just a reminder and a couple of things I forgot that are relevant.
First a Hadlow run down of uploading AutoCAD.


Just a reminder and a couple of things I forgot that are relevant.
First a Hadlow run down of uploading AutoCAD.


Second.
Please bring (min 2GB) memory stick for your work to save, as well as work you have completed at home that you may need help with.
Third
A reminder for next week, to bring in you sketched sketch designs, where you intend to place the bench and why. I will go round the class for a quick reference. The reason for the rush is that the sooner you have a design the quicker you can start putting it on AutoCAD and thus the sooner I will know the problems that you are struggling with, and with that knowledge can adapt the lessons to solve them.
With the prize of getting onto Sketch-up and photoshop, sooner rather than later.
Forth
Bench designs, no cubes!!!! The reason this is still a CAD lesson and even though I have introduced a design element to it, I still want to stretch your abilities (the dividends will come later). So be bold, and any issues we can over come.
Apparently (heard this years ago) the literal translation of the word 'problem' from the Greek, means 'push forward.'
Happy play
Grant
Saturday, 14 January 2012
If you only watch one Video
How people use space
Its an hour long and the quality is a bit poor at the beginning, but soldier on, it will be worth it.
Its an hour long and the quality is a bit poor at the beginning, but soldier on, it will be worth it.
Why Capability
Memorable
Thats it, just simple, easy to remember and associate with. Either Capability Brown or just a good positive statement. (along the lines of an excellent web design book called 'don't make me think').
Introduction
This is a tough course, but it should also be fun. So use the time to really think out of the box, this will be one of the very rare occasions that you will have the opportunity to do so.
The first post is the sheet I sent round over Christmas, links etc.
If you have questions just put them in the comment box and I will try and help. Though the best way to learn CAD is to wrestle with it until you find the answer through experiment and breakthrough.
Digital Basics
Hi All,
First of all some links for software.
David Watson is a tutor at Greenwich University and has created some extensive web sites for the student community. A resources for you to use. Loads of tutorials and links.
Cadtutor is a site to help all with Autodesk, Adobe and other digital products. A massive resource. Take some time to have a look around.
Coursestuff is a more specific site for Greenwich and Hadlow students. Again with tutorials and links.
This page offers information on downloading Autodesk AutoCAD (student versions), Google Sketch-up and Adobe photoshop (student versions). Just scroll down to the relevant section. Note, Adobe student programs are not free. If you can afford it I would recommend Adobe Creative Suite 5.5 Production Premium as it contains film editing apps that will come useful later in your studies.
Minimum Course Requirements
AutoCAD 2012
Sketch-up 8
Photoshop CS5 or 5.5 (no actual difference). If you bring in and work on stuff done on CS3 it won’t be back compatible from CS5
Power Point
Mac users
I would advise you use bootcamp and set up a partition (100Gb if you can spare the space).
http://manuals.info.apple.com/en/boot_camp_install-setup.pdf
Windows 7 (alas XP no longer works on Lion, Snow leopard, but if you have leopard you may be in luck).
Then load as above the relevant programs. In particular AutoCAD, as the layout is completely different on a mac (madness in my opinion).
If you wish to use Photoshop and Sketch-up they are broadly the same (just slightly different short-cuts) and should be no problem.
Keynotes can be exported as a Power point, though you will lose some of the more fancy transitions and fonts. I shall show you some work-arounds. As and when.
Books
Find below two selections of books, some that would be worth purchasing and others at least borrow and make your own mind up.
Books to purchase (in my opinion i might add)
A really good reference book for the course and for the rest of your time grappling with AutoCAD. Nicely set out with plenty of images.
A must for all Garden Designers and LA’s. Some good rendering ideas and techniques. All three programs covered. A very specific book to our industry.
A good book to dip in and out of for specific photoshop techniques.
Terrible cover, but don’t be put off.
This book is not about Cad, but its a brilliant reference book to design principles and is a great help when you get stuck or need reassurance.
Every designer no matter what field should have this book on their shelves, invaluable. ( I am sure Rod has already recommended it to you).
Books to Borrow
Its in the Library, very 50’s style, but a good book to look at, if you want to understand light, shadow and atmosphere. This will become relevant when we look at rendering techniques.
As the course progresses i will add some video tutorials for your reference, as when you require them. If you are really nervous about the course, well i won’t lie its not easy, especially if you have an aversion to all things technological. So we will take it slow in class, but the only way to ‘get it’ is practice. So i will be setting your projects straight away so you can practice and then progress each week as questions arise and get answered. Don’t panic we have some great tools at our disposal and as any tradesmen will tell you ‘skill comes with practice.’
If you get some time i recommend looking at Davids Basic section on AutoCAD
All short videos, but worth looking at to understand some of the terminology.
Subscribe to:
Posts (Atom)